Here is a really fun easy activity for kids to try.
Supplies
- 2 paper plates
- acrylic paint in black and your choice of colors
- 2 large googly eyes
- E6000 glue or glue stick
- black felt
Craft tools
-
Hole punch
-
Paper fastener
-
Pouncer sponges
-
paintbrushes
Instructions
-
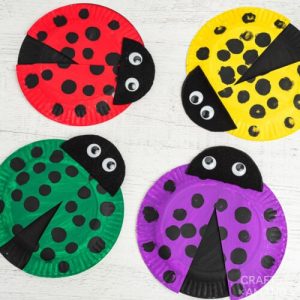
Paint one paper plate black and the other in whatever color you choose. Red is traditional for ladybugs, but you can get colorful like we did if you like. Set aside to dry.
-
From black felt, cut out half a circle for the head. Use a jar, small bowl, or cup to trace a circle onto the fabric.
-
Once the paint has dried, take your colorful painted plate and begin making polka dots using a pouncer sponge lightly dabbed in black paint. Use multiple sponge sizes to create a realistic ladybug pattern.
-
After allowing the polka dots to dry, take the color paper plate (not the black one) and cut it in half. Line the two halves up with the black paper plate and spread the “wings” open a bit. Hold at the top and carefully poke a hoe through the top of the wings and through the black plate underneath. Still holding it in place, push the fastener through the hole and secure.
-
Glue the head over the top of the wings to hide the fastener. Glue wiggle eyes onto the head.
Source Credit: https://craftsbyamanda.com/